 Skip to content
How to iron badge on shirt
The hot glue on the back of the iron-on patch will partially melt after heating, allowing the patch to be tightly connected to the clothing. It is solid and stable and will not leave stitches like the sew-on patch. In recent years, it has been loved by fashion brands and patch lovers. But if you buy the iron-on patch for the first time, have you encountered a problem and need help with how to use it? Don't worry, in this article, I will introduce you on behalf of Badges UK to how to use the iron-on patch to add a personalised colour to your clothes!
Material Selection and Preparation
Choose the Proper Material of Shirt
First, we can check the requirements of the clothes' washing label for ironing patches. If there is no description on the label, we can judge whether the fabric of the clothes can use the iron-on patch. Usually, clothes made of cotton, polyester, denim, and flannel can use iron-on patches to iron patches on clothes, but clothes made of silk, wool, artificial leather, and plastic are not recommended to use iron-on patches because these fabrics are fragile and not resistant to high temperatures, and ironing may damage the clothes or even cause a fire.
Choose the Proper Patch
If you need to know what type of backing the patch you bought belongs to, you can check out the badges series of patches from Badges UK to learn more. Iron-on patches usually have a layer of hot glue on the back, while sew-on patches have a layer of fabric without any other materials added. Embrodiered velcro patches have hook lining on the back, which can fit with clothes with loop lining sewn on them. You can now distinguish these three types of backing patches well.
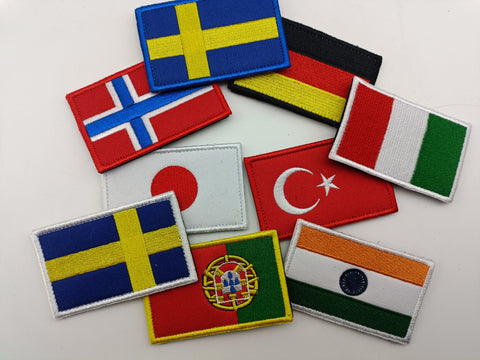
In addition to paying attention to the type of patch backing, you should also choose a good-quality patch. You don't want your patch to be scrapped after a few uses, right? Poor quality iron-on patches use inferior backing glue, which is easy to crack and fall off. Here, I recommend you choose your favourite patch from Badges UK. They offer a wide range of styles, including flag patches, military patches, and cute cartoon patches with various patterns. If these patches can't meet your needs and you have more unique ideas, you can also find the Badges UK service team to customise patch for you!
Prepare Tools and Materials
Before ironing the patch, we need to prepare an iron, ironing board, cotton cloth or towel, and pins.
Ensure that the bottom of the iron is clean and tidy without any impurities to avoid affecting the ironing effect. Turn off the steam function because water vapour will affect the patch's bonding effect.
The ironing board can provide stable conditions for our ironing. Of course, make sure that the clothes and patches are laid flat on the ironing board.
Choose a towel of appropriate thickness. When the fabric of the clothes is fragile, choose a slightly thicker one; otherwise, choose a thin one. The towel is mainly used as a protective layer to prevent the patch from being damaged when the iron contacts the patch at a high temperature.
Pins can help us fix the position of the patch on the clothes to avoid accidentally moving the patch during ironing and affecting the final effect.

Where the patch Needs to be Placed
The patches are located on different shirts. Usually, we stick the patch on the left chest of the shirts, such as the school patch on the school uniform and the company logo on the work clothes. As an organisational logo, it can enhance the members' team awareness and sense of belonging.
For hats (usually duckbill caps), we will stick the patch in the middle, which can add a little fashion colour to the monotonous hat and show your unique taste.
Bags only have a few requirements for the location of the patch. You can iron it anywhere you want. As a fashion item, it is also the design inspiration of many luxury brands.
Pants are also very suitable for ironing patches. You can iron the patch in the position of the trouser pocket, which is also a very common position, which can increase the ornamental value of the pants. Of course, there needs to be a fixed saying where to iron the patch. It depends on your unique aesthetics. After determining the position, remember to fix your patch with a pin!
Ironing Steps
Set the Iron to the Right Temperature
Of course, the ironing temperature is also very particular, and clothes of different materials must be ironed at various temperatures. Setting the iron to the right temperature can make our ironing smoother and achieve the desired effect~ Our iron has three temperature settings: low, medium, and high. The higher the temperature, the higher the requirements for the material of the clothes. High temperature-resistant fabrics include pure cotton and linen. We can make the patch and clothes of this material blend perfectly at high temperatures. Some materials, such as woollen clothes, are not so heat-resistant, so we need to adjust the temperature to medium when ironing. We also need to be very careful about some materials, such as silk, polyester, and nylon fabrics, and iron them at low temperatures; otherwise, the clothes will be damaged.
We should also pay attention to avoid accidents when using the iron and don't let it hurt us. The temperature at the bottom of the iron will be very high when it is in operation. If it touches our skin, it will cause burns, so we must hold the iron in the correct posture, not facing it towards ourselves but laying it flat.
Be careful not to leave the iron for a long time, turn it off when not in use, or place it vertically. Otherwise, it will cause a fire. In addition, please don't put the iron on the edge of the table to prevent it from falling and hitting you.

Ironing Process
Some friends may worry that iron-on patches can be firmly attached. My answer is that if you choose a patch with good material and master the correct ironing method, it will be very firm. Of course, if it becomes loose after washing it several times, you can iron it back on. Now let me tell you how to iron them~
- Step1 According to the judgment method I mentioned earlier, heat the iron to the appropriate temperature according to the material of your clothes
- Step 2 Place the clothes to be ironed on the ironing board. If you don't have a professional ironing board, you can also find an insulating, flat plastic board or wooden board instead. The purpose is to allow the clothes and patches to be better bonded together under a certain pressure
- Step 3 Place the patch to be ironed in the position where you will fix it. It is best to fix the patch with a fixing pin. When ironing later, you can bypass the position of the fixing pin. After the other parts are ironed, remove the fixing pin and iron it again.
- Step 4 Find a cotton cloth or towel to cover the patch. The thickness of the cloth depends on the material of your clothes. Cotton cloth can block the high temperature of the iron and prevent the patch from being deformed or damaged after direct contact with the high-temperature iron.
- Step 5 Do not move the iron left and right when ironing, which will cause many wrinkles on the patch, and it will be easy to loosen later if it is not fixed firmly. The correct ironing technique should be to stay in one position for 30-60 seconds, then pick up the iron, and then iron other positions, repeating this operation until the patch is wholly ironed on the clothes.
- Step 6 Remember to iron the back of the patch after ironing the front! It is mainly to ensure that the adhesive backing of the patch can be completely melted and bonded to the clothes. When ironing the back, covering it with a layer of cotton cloth is unnecessary. You can iron it directly. Generally, the front of a small patch needs to be ironed for 30 seconds to 1 minute, while the back only needs 30.
- Step 7 After ironing, lay the clothes with the ironed patch aside and wait 15 minutes for them to cool down. Then, check whether the patch is firmly fixed on the clothes and whether the position is correct.
- Step 8 If you are worried that it will fall off after a few uses, you can also use a needle and thread to simply sew the edges around it to make it more secure.
How to Clean the Patches
To prevent your patch from falling off so quickly, I recommend washing clothes with iron-on patches less frequently than necessary. Frequent washing will reduce the stickiness of the patch. Never wash it with overheated water, which will also melt the glue of the patch. Just wash it with cold or warm water. Clothes with patches can be washed in the washing machine, but it would be better to clean them by hand, which can extend their life. When hanging clothes, it is best to blow dry them naturally in a sunny place, but do not expose them to the sun, and do not use high-temperature drying and bleach, which will shorten the life of the patch.
The Other Two Types of Patches
How to distinguish between ironing backing, Velcro backing, and sewn backing
In addition to iron-on patches, there are two other popular patches on the market: Velcro patch and sewn-on patch. These three patches are very similar, and the most significant difference is the choice of backing. The back of the iron-on patch is a layer of glossy glue, which will only become sticky after heating and melting. Velcro patch, as the name implies, is a patch that is fixed to clothes by Velcro. The back of the patch is sewn with a Velcro loop, and you need to sew the Velcro hook to the clothes you want to fix. The sew-on patch is simple in design, with only a layer of base fabric on the back and no other materials. You need to sew the patch around the edges with a needle and thread when using it.
Advantages and Disadvantages
These three methods of fixing patches are different and have distinct advantages and disadvantages. Iron-on patches are more convenient and quicker to use. You only need to heat it with an iron to melt the adhesive so that the patch can be attached to the clothes. However, the adhesive becomes less sticky after repeated washing and easily falls off. It also tests the user's ironing skills. Too high or too low a temperature will make the adhesive less sticky. Velcro patches are easy to remove and replace, especially suitable for sports clubs and the military, who can quickly replace different patches according to other activities. However, Velcro hooks can quickly hook fabrics such as wool, damaging clothes. Some Velcro of poor quality will also lose stickiness after repeated use. Here, I recommend the Velcro patch launched by Badges UK. Their patches are of better quality and are trustworthy. The sewn-on patch only requires sewing the patch on the clothes with a needle and thread. Once sewn on, it is more durable and not easy to fall off. However, because it requires additional sewing, it will leave noticeable stitching marks on the patch, which may affect its appearance. In addition, it is also time-consuming and labour-intensive to remove it again after fixing it, which is unsuitable for occasions where patches need to be replaced frequently.